We spent the weekend being crafty. My kids are on a BIG Harry Potter kick, about 5 years behind the times, but loving it none the less. We watched most of the movies in the car on the way to and from California and all over Arizona and Texas this past month. They turn everything from straws. to sticks to granola bars into magic wands.
I love listening to them and watching the big kids get completely involved and play along. In fact, we have made up a list of our own “Ivanovsky Spells.”
My Favorite? In place of one of the more popular Harry Potter spells “expelliarmus” the Ivanovsky version is “smelly lamas.” I am sure you can see how the rest of them go!
My oldest has a “real” Harry Potter wand he got one year from Santa, it was the pricy kind at $40 that is motion activated. The little kids drug it out and have been fighting I mean sharing it nicely all week. They had a lemonade stand earning $42 and decided to pool the money to buy another wand. Like that is going to go well…
My crafty 8 year old got online and found many different sets of instructions on how to make a wand. The other kids shook their heads and said “no!” She begged me to help her make one. Since I had just about everything I said sure, and we got started.
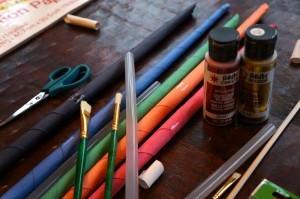
You will need:
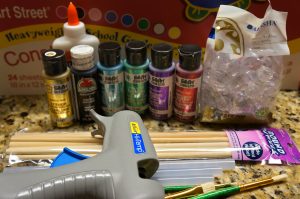
- Glue Gun / Glue Sticks (about 3 large ones for each wand)
- Craft Paint (we liked metallic and glitter)
- Construction paper
- Chop Sticks or wooden dowels
- Elmers Glue
- Marble or something to put at the handle end. We found a bag of wedding gems at Walmart for $3.50 that worked perfectly.

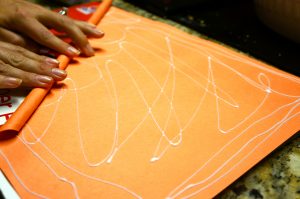
Place glue on one side of any color of construction paper.
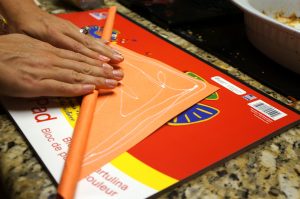
Take your chop stick and roll from the corner tightly.
When I got to the end, I taped the corner down and we left them to dry.
Now, when they are all dry, you will need to cut off the ends so they are flat.
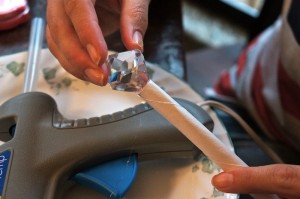
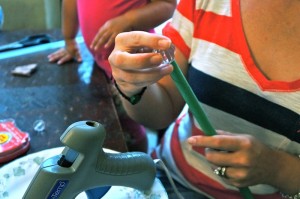
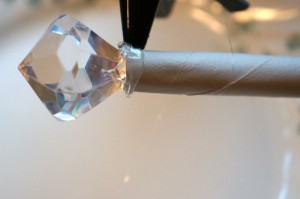
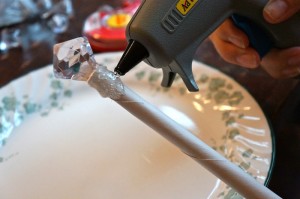
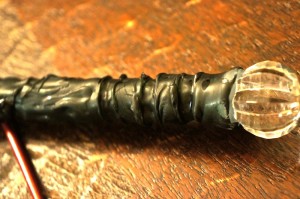
Working with one end, I filled the end with hot glue and stuck the end of the gem in. I turned it upside down and held it until the glue had set.
The bigger kids started to take notice and thought we might be onto something cool, so they started making their own construction paper tubes!
Once the top was set, I took more hot glue and make rings around the gem and tube reinforcing it even more. I needed them to be sturdy!
This is where your glue gun skills come in handy! If you lived though the craft phase of the 90’s you know what I mean! 🙂
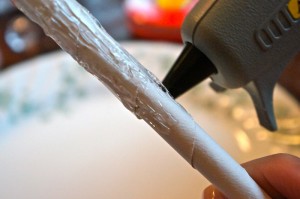
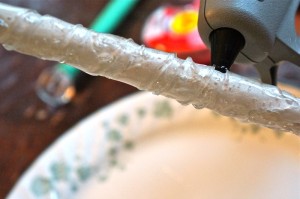
Start from the below your gem/marble and start building up a few layers of glue. I tried to spread it down, and as it would drip I would roll it around, making some kinda funky patterns.
The thickest layers need to be at the top and get thinner as you go towards the bottom. Just keep in mind what a wand might look like with a handle.
Once you have the first 1/2 of the wand done and before the glue cools, use the tip and make designs in the glue. This will give your wand cool dimensions and areas to paint when you are finishing it.
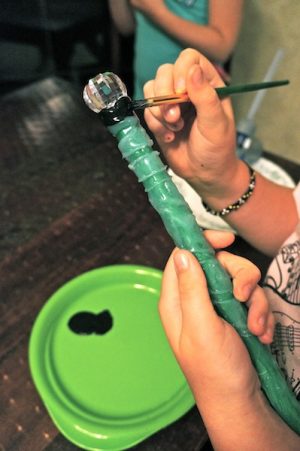
Once the glue has cooled, you will paint a coat of solid black over the wand as a primer.
The black really pulls out all the 3D of the glue. They start looking really cool at this point.
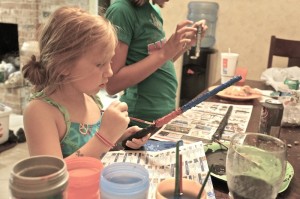
By now, I have all 7 kids making a wand 🙂
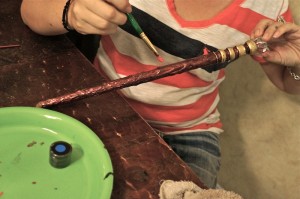
Once the black has dried, you can start painting your wand. My kids liked the glitter and metallic paint for theirs. We used gold a lot for the accents.
They took a few coats because of a few mind changes. Plus a few hours of drying time. But once they were done I thought they looked REALLY cool!
The kids were really proud of themselves as well. The big kids were so impressed they wanted to have friends over to make some with them!
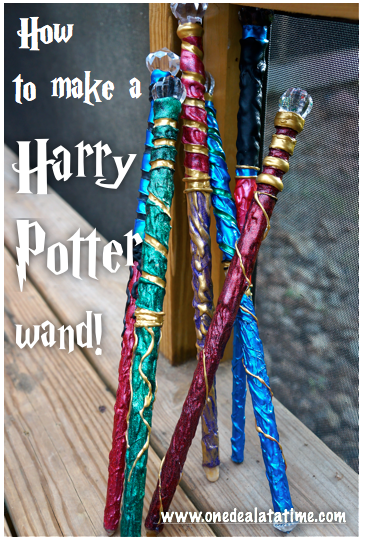
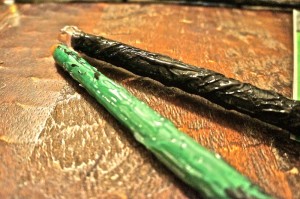
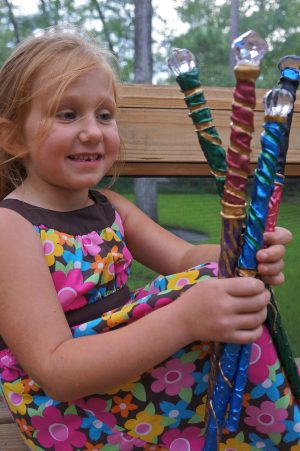
These are our finished Harry Potter wands. They are very sturdy and really neat looking! When you feel them it is hard to imagine that they are made of chop sticks, construction paper and hot glue!
I added a few more lines of hot glue at the end on the wands where I painted the gold you can see to give them more of a 3D look then they already had.
For the other end, the kids went out and grabbed a few little rocks and we glued them in. One of the kids use a small gem for theirs, and one of the kids didn’t want anything and I filled the end with hot glue. These really feel like they were made out of wood.
They spent all day playing with them.
One final step that I have not done yet but will when I can get them back is to take a few small drops of black paint and mix it in a lot of water to create a wash. I want to “antique” them some and so I will brush the paint water on and then wipe it off so it creates an antiquing effect.
Cost of a fancy Harry Potter wand: $40 x 7 kids = $280!
Total cost of our Harry Potter wands: $21 for 7!
I am assuming you have a glue gun in those calculations! I had to buy some paint, the gems, and more glue sticks. Total saved = $259. Now if I can just figure out how to make them light up!
![]()



 Part comedian, part Dad, part athlete. He will boss around your children while they play ball.
 Just as angelic as she looks, this girl could easily raise a Village by herself, and all the children would grow up to be President.
 Self proclaimed, she would be a webkinz dog. Because, "they're cute, and puppies are too. And they're sweet and they always get along with other puppies."
 This mini-Martha Stewart can handle ANY craft you send her way. She isn't all bows and rainbows, she's got karate kid moves!
 Not "Pick-Me-Up" like caffeine, she wants you to pick her up! AND NOW!
 Anything that can be destroyed WILL be destroyed!
 Practically Perfect in Every Way for now! Nicknamed "The Panda" she is rolly polly and lives by the motto, "the little one, is KING!"
 The resident Labradoodle, Miller got his name because Mom won and got to name the baby! Need something chewed up? He'll take care of it. Especially if it's expensive..
Awesome! My 16year old wants to make some.
My sis started to make one and later I found this it must be destiny to make one ;-;
Those are really cool! 🙂
Oh my goodness, these came out great! I have 4 children under the age of 10 and they are all Harry Potter fanatics – I can’t wait to try this with them! How very creative of you, thanks so much for sharing:)
So that’s what you did with all the chop sticks from China! Boy are the folks here going to be disappointed in you guys 🙂
When I made my HP wand I had my dad drill a hole in the top of the wand and then put a glow stick in it to make it light up. It’s not super high tech or anything but it is a fun touch. 🙂
That is AWESOME!
This has got to be the coolest thing I’ve seen in a while! Would you mind posting an updated pic when you “antique” them? I would love to see how they come out.
wands are awesome
I love harry potter I’ve seen all the movies.
wands are awesome
I used a wooden spoon handle so my toddler could grasp it better. It’s turning out great, so far!
Those are awesome
Last year a few other mom’s and I had a stall at our school spring fair. We had the usual home baked things and I made 40 fairy wands…the problem was, even though these sold very quickly, boys wanted something!!! This year there will be Harry Potter wands for the boys!! Thank you SOOOO much for a terrific tutorial. I have 6 children, so I’m sure they will be happy to help me make the prototypes! Here’s my fairy wand tutorial if your girls would like a new project… http://littlesnowflower.blogspot.com.au/2012/08/fairy-wand-tutorial.html
So cute!!
I can’t wait to make this for my best friends b day. She loves Harry potter!!!!
Thank you for your tutoial and inspiration. We’ve been working on our wands this weekend as my daughter has scored Harry Potter for her Book Week parade this coming week.
To make you wand light up you need to go to a dark area, hold the wand upright at about shoulder height and say “LUMOS”. I think you need to be a second of third year at Hogwarts for this to work though. LOL
i need to make a harry potter wand for homework and your post was brilliant thanks a lot
\
Was their a brand name for the wedding gems?
Wow those look really cool! I will have to try making on sometime soon. I am pretty obsessed with Harry Potter and that looks really fun!
FANTASTIC, thank you so much