Fall is my favorite season and I am always looking for cute (and easy) crafts to make to decorate with! There is nothing quite like having the windows open, the soft glow of lit candles, and the smell of cinnamon and pumpkin in the air. I saw this cute tutorial for Twine Pumpkins on Pinterest and decided to give it a try! I got almost all of the supplies at Dollar Tree.
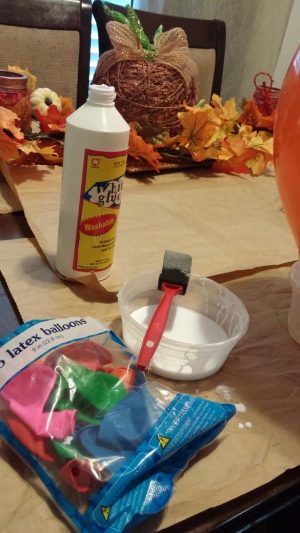
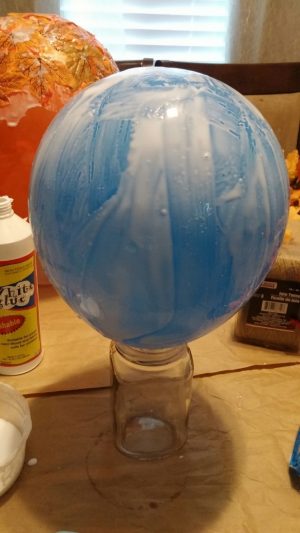
Pick up a box of twine, big bottle of glue, foam brushes, balloons, and gloves from Dollar Tree, or you may already have them at home! DT also had Mod Podge, but it was a tiny bottle and glue works just as well! I taped my balloon to an old jar, but you can use a bowl also. Pour glue in a bowl.
Blow up a balloon and cover it in glue.
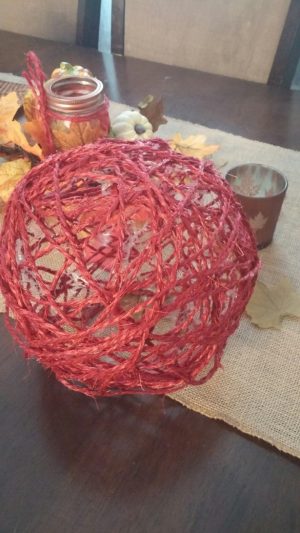
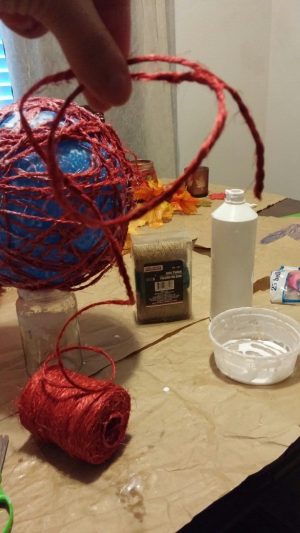 Cut off sections of twine, around two or three feet long and dip them in glue. Wrap it around the balloon in different directions. Make sure you tuck the ends under the other twine as you wrap it.
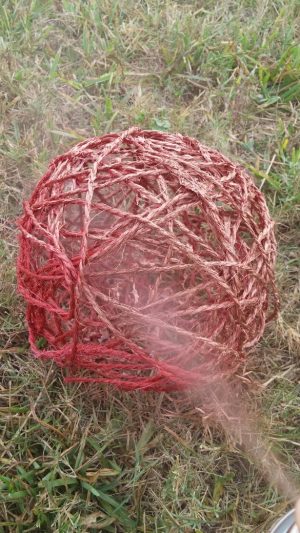
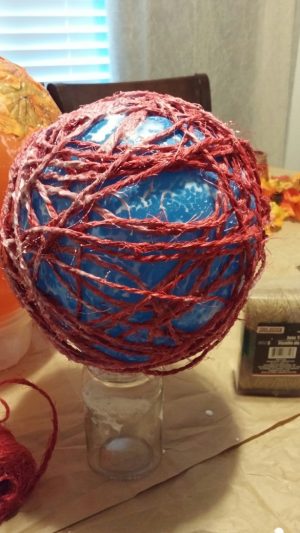 Make sure you have a good sized opening in the bottom to insert a candle or string lights. Allow it to dry overnight, but make sure you turn it over so the bottom will dry also.
Instead of just popping the balloon, make a small slit near the tie so it will slowly deflate.
I picked up Metallic Spray Paint from Michaels. They are regularly $6.99, but there is a 50% coupon online, so I grabbed it for $3.50.
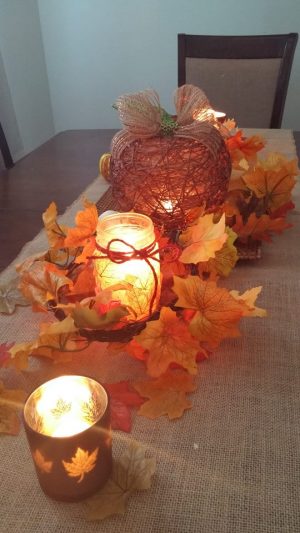 All in all, I decorated my dining room table for under $10!
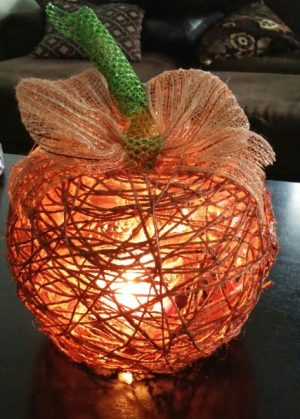
I made two different pumpkins: one with the Dollar Tree twine (which is thinner) and one with twine that I already had on hand. I actually preferred the smaller twine. It was easier to work with and I like the way it turned out! You be the judge. After it dried, I made a stem out of ribbon and popsicle sticks and a bow out of burlap, but you could also use a real twig like Lisa from Recaptured Charm. Hers turned out so cute! She also used string lights and I just used a candle.
Thank you Lisa for this awesome craft idea!


 Part comedian, part Dad, part athlete. He will boss around your children while they play ball.
 Just as angelic as she looks, this girl could easily raise a Village by herself, and all the children would grow up to be President.
 Self proclaimed, she would be a webkinz dog. Because, "they're cute, and puppies are too. And they're sweet and they always get along with other puppies."
 This mini-Martha Stewart can handle ANY craft you send her way. She isn't all bows and rainbows, she's got karate kid moves!
 Not "Pick-Me-Up" like caffeine, she wants you to pick her up! AND NOW!
 Anything that can be destroyed WILL be destroyed!
 Practically Perfect in Every Way for now! Nicknamed "The Panda" she is rolly polly and lives by the motto, "the little one, is KING!"
 The resident Labradoodle, Miller got his name because Mom won and got to name the baby! Need something chewed up? He'll take care of it. Especially if it's expensive..